
Table of Contents
While gutter installation projects are often handled by professionals, installing gutters DIY is possible if you know what you’re doing and have the right tools. You must take the right steps during the installation process if you want to avoid making a costly mistake.
If everything goes according to plan, the water should be diverted away from your home without issue. Once you purchase the right downspouts for your home, you can get started with the installation process. When you run into a problem or don’t know what to do, just reference this guide.
Essential Tools and Materials for Gutter Downspout Installation
Before you can begin connecting downspouts for gutters, you’ll need to buy or rent the right tools for the job. You’ll be handling many different parts, which is why this project requires numerous tools. The many parts you’ll work with include hangers, elbows, straps, and connectors. Make sure you have the following tools by your side before you start this project:
- Measuring tape
- Screwdriver and drill
- Metal file for sanding down edges
- Hacksaw or snips to make cuts
- Safety equipment, which includes everything from goggles to gloves
You can start by cutting the downspout to make sure it fits the elbow connector. You’ll then be tasked with attaching this connector to the bottom portion of the gutter.
This connection should be secured with screws or pop rivets, after which you can attach more connectors and elbows as required. Once the gutters reach ground level, secure every connection with straps or hangers.
Measuring and Cutting Gutter Piping
Likely the most challenging aspect of DIY gutter installation for downspouts is measuring and cutting the gutter piping. You must make the right measurements to ensure you don’t need to buy more piping. The saw or tool you use for this process needs to be strong enough to cut through metal at the precise measurements you’ve marked.
You must first measure the amount of pipe that’s required to run from the uppermost portion of the gutters to the outlet. Once you’ve taken these measurements, use a permanent marker to note where the cuts need to be made. At this juncture, you can fit the elbows into the drainpipe.
Keep in mind that the elbow pieces you require for the project must be measured as well. You’ll use the same saw to cut each piece. None of the edges must be jagged. If they are, your gutter system might not function properly.
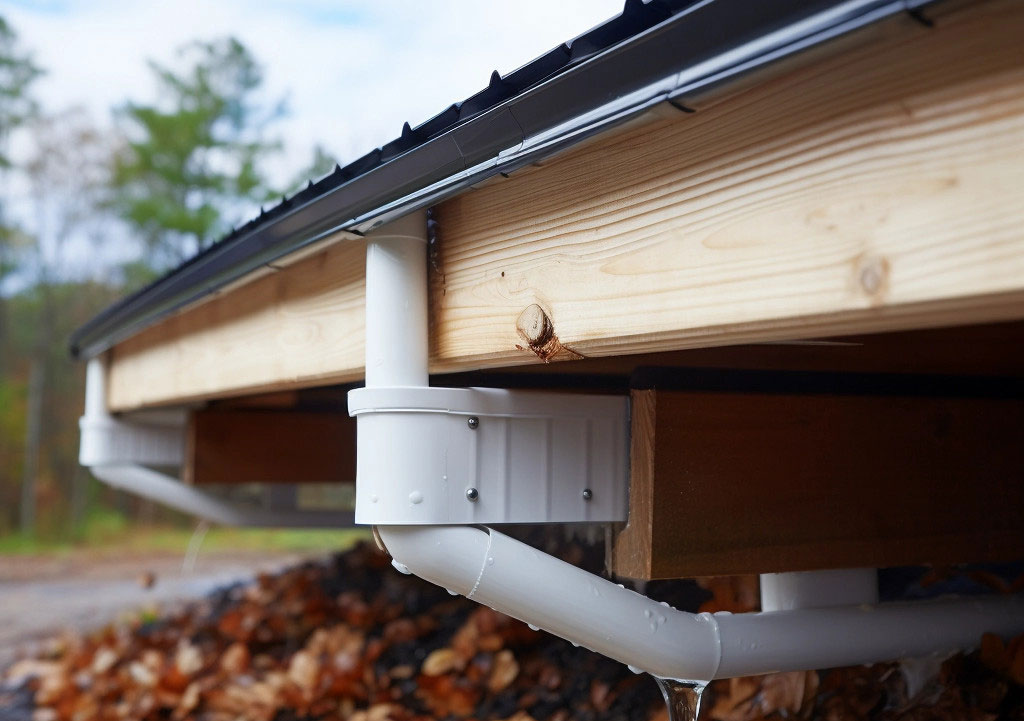
Connecting Downspout Elbows and Installing Downspouts
After you’ve cut the downspout elbows, you can connect them to the rest of the gutter system, which shouldn’t take much time. Start by inserting one of the elbows at the end of the piping. Make sure the connection is secure. You can keep the elbow in place with a fastener or clamp. You should also use pliers or a wrench to help you complete this task.
Once both pieces are connected, repeat the same steps to connect the next downspout elbow. Before you proceed to further steps in this guide, make sure each connection is tight and secure. If the various pieces that make up the downspouts haven’t been secured, they could come loose during severe thunderstorms or windy conditions.
After you’ve concluded this step, you’ll need to return to measuring. The gutters must be measured to make sure they’re the proper length for the downspout.
Use a permanent marker to note the location where the gutter will be connected to the downspout. You should then drill holes in both ends.
When attaching the downspout to the gutters, do so with screws or rivets. The other end should also be put in place and secured with screws or rivets.
If certain sections of your gutter system are curved, you might need to use elbows that can help you fit the downspout around corners. As mentioned previously, every measurement you make must be precise.
Once all the pieces are in place, secure them. A sealant may be needed to provide more security and avoid water leaks. Place underground drains or blocks along the bottom of every downspout.
These items will move extra water away from your home’s foundation, which should keep pooling issues at bay. If the surrounding soil is healthy enough to support underground drainage, your home can benefit from this type of installation. Otherwise, splash blocks will be required.

Most of your work is now done. However, you may wish to attach extensions, in which case you’ll require an extra piece of aluminum or steel gutter for every downspout. Two more elbow connections will also be required for every gutter section. Start by measuring the distance from the lowermost portion of the downspout to the area where you want the gutters to start. You can then cut gutter sections with a power saw or tin snips.
When you connect gutter sections, they need to overlap by six or more inches. You can make the connections with screws or other sealants. They need to be secure before you complete the project.
Maintenance and Final Checks
Now all that’s left is to do a final check and perform maintenance as needed. By properly maintaining your gutter and downspout system, it should last for many years before you need to replace it. A malfunctioning gutter system can cause water damage to your roof and foundation, which is why maintenance is required.
If you wish to maintain your rain gutters, make sure you clean them regularly. No matter the quality of your gutter system, twigs, leaves, and other types of debris can become stuck, which causes blockages that need to be manually fixed. You can remove these clogs with cleaning tools or your hands. Before you finish, rinse the gutters with a water hose.
It’s possible to reduce the amount of maintenance you need to do by installing gutter guards. These items can protect your gutter from most debris, which means that you won’t need to clear blockages as often.
Your gutter system likely includes splash blocks that are designed to move runoff water away from your foundation. However, splash blocks don’t always work properly. To be confident that water is being correctly diverted, think about installing downspout extensions.
Conclusion
FAQs about LESSO Gutter
It’s built to withstand various weather conditions, including heavy rain and snow, due to its high impact and pressure resistance.
Yes, the system allows for the collection of rainwater, which can be reused for various purposes like gardening or cleaning.
The product includes complete accessories to address various installation scenarios, including roof corners and balcony drainage.
Recommend Reading

Deciphering the Difference: Gutters VS. Downspouts
Table of Contents Gutters and downspouts Are the Key to Managing Rainfall, every building has some type of gutter system in place. These important features
How Often Should You Clean Your Gutters?
Table of Contents Cleaning your gutters regularly will help you extend their life and maintain the health of your property. Read on to learn more