LESSO Blog

Installation Guide of LESSO PP-R Pipe and Fittings

LESSO PP-R Pipe Installation Guide
cut the lesso pipe rectangularly

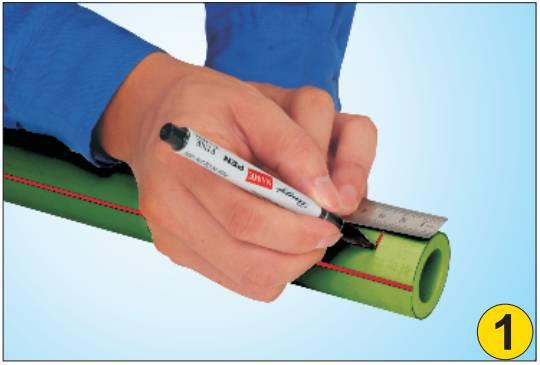
Step 1. Cut the pipe rectangularly with pipe cutters. Take care that the pipe axis is free from burrs or cuttings debris and remove where necessary. Mark the welding depth at the end of the pipe according to the socket depth of fittings.

clean lesso pipe socket

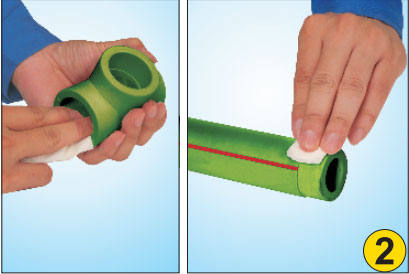
Step 2. Clean the socket and the spigot with cleansing clothes.

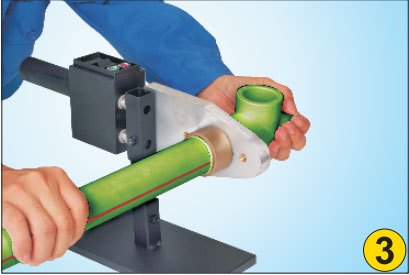
Step 3. After the welding machine reaches the necessary operating temperature, push the end of the pipe and fittings, without turning, up to the welding depth into the welding tool. Heat up the pipe's spigot and fittings' socket according to the following heating time.

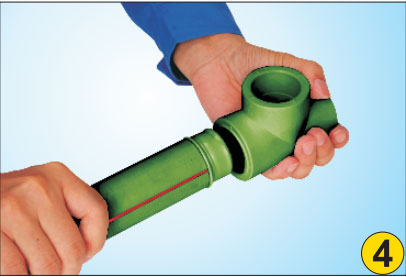
Step 4. After the heating time, quickly remove the pipe and the fittings from the welding tools. Join them immediately without turning, until the marked welding depth is covered bythe bead of PP-R from the fittings.

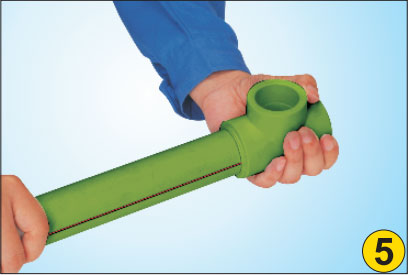
Step 5. The joint elements have to be fixed during the specified assembly time. After the cooling period, the fused joint is ready for use.

Finish the welding

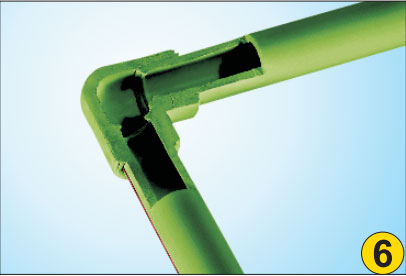
Step 6. Finish the welding.

The fusion is subject to the following data

Remark: The heating time should comply with the requirement of products and be adjusted according to the working tempe-rature. When the working temperature is below 5°C, the heating time should be extended by 50%.

LESSO Flange Joint PP-R Pipelines

  1. Wrap the PP-R pipe with the metal flange tray in advance.
  2. Connect the PP-R pipe and flange faucet by heating welding.
  3. Wrap the flange faucet with the metal flange tray.
  4. Keep the flange of PP-R pipe and flange of steel pipe vertical to the axes of pipes.
  5. Add the washer between the two flanges, the washer should be heat resistant and meet the sanitary requirement.
  6. Set up the brackets, connect the two flanges with the same size bolt in one direction. The bolt should be tighten without coaxial tension.

Layout of LESSO Pipe

  1. LESSO Pipe should be installed in invisible manner; but avoiding the main wall.
  2. Pipe can be installed in pipe well, hole or ceiling. When diameter of pipe is not more than 25mm, the pipe also could follow the grooved wall or cushion layer in the manner of butt-fusion connection. The pipe used for heating should be protected by corrugated pipe sleeve which thickness is not less than 10mm
  3. If exposed to impact, freeze or sunshine, pipe should be protected reasonably.
  4. When crossing the wall, girder; board or pole, pipe should be covered with sleeve pipe. If the crossed wall is underground wall, special moisture-resistant sleeve pipe is needed. Additional water-repellent measure should be taken into account when pipe crosses the floor layer or house wall.
  5. Keep pipe far away from heating source. Vertical pipe is at least 400mm distant from water heater or cooker. If above requirement can’t be fulfilled completely, heat-isolation measure should be taken with the distance not less than 200mm.
  6. PP-R pipe must not be connected directly to water-heater where mental pipe with the length of at least 400mm should be used for transition.
  7. Pipe should not cross extension slot or sedimentation slot. If pipe has to cross it, relevant measure should be taken against the extension or shearing distortion from pipe itself.
  8. Mental pipe is used as supply and drainage pipe of tank and connection pipe from tank to valve.
  9. The weight of valve should be fixed by additional support instead of pipe which is connected to valve.
  10. Take UV protective or heat-isolation measurement when the pipe will be hanged in the air or exposed in the sun.
  11. Lay the LESSO outdoor pipe connecting to house under the freeze­ depth according to local climate. The depth of soil above the top of pipe should be not less than 300mm.