
Table of Contents
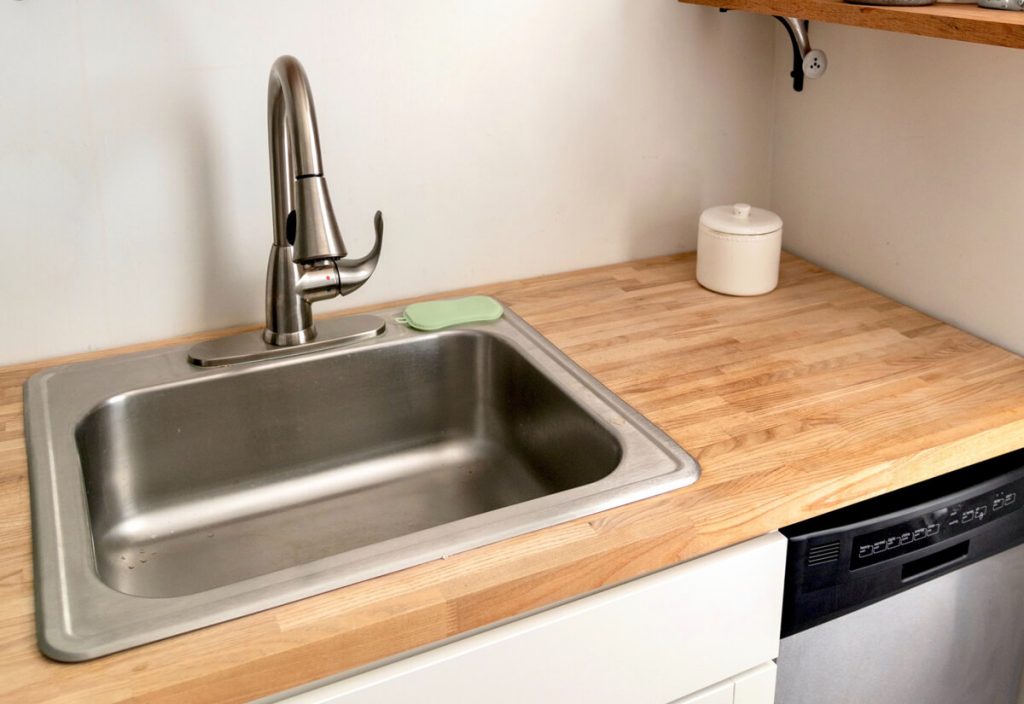
A sink basin is possibly the most frequently used appliance in every kitchen. However, they are vulnerable to problems like rusts, blocked sink drains, or leaky faucets. If you are currently troubled by similar headaches, it is time to consider installing a new sink in your kitchen. The best days of replacing your kitchen sink and refreshing the overall look of your kitchen is coming.
Nowadays, sink installation can be rather simple. The first thing is to select a kitchen sink based on the your kitchen design and your budget plan, and the rest is to follow our steps below and see how to install a sink basin by ourselves. You can also grasp some additional notes specifically prepared for a green hand.
Step one: Measure the Kitchen Sink Opening
Before replacing your sink or placing a new sink on the countertop, you need to measure the size of your sink and leave enough space for installation so that your sink fits the opening. With an existing template, this task is relatively easier. You can measure the size of your old sink and buy one of the similar specifications and make minor adjustments based on your new sink.
If you want to add a new sink or move your sink to another location, you may need to measure the dimension of your new sink first. Then, decide the opening of your countertop and kitchen sink plumbing according to the size and location of your new sink. For further convenience, you can also use a straightedge to measure the size and trace the outline with a marker pen or tape. Besides, if you are considering a kitchen sink with a cabinet, make sure that the depth of your sink matches the cabinet.
Step two: Install the Kitchen Faucet
After deciding the location of your sink basin and the size of the opening, the next step is to install the kitchen faucet. First of all, turn off the valve and cut the supply lines. Then, flip the sink over and insert the tailpiece of the faucet and the tubing through the hole of your sink.
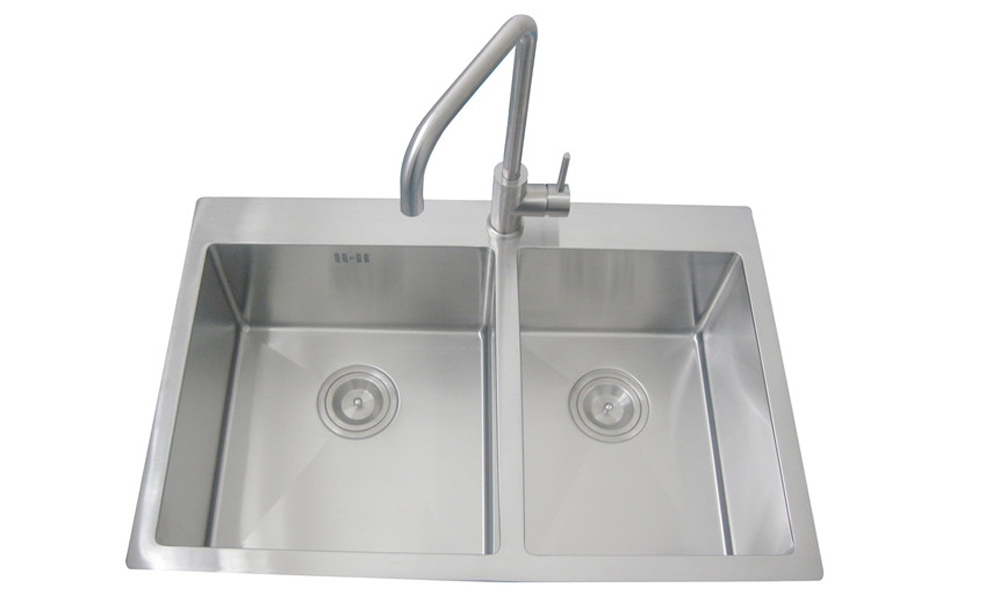
If you want to install sinks with two basins, you should pay attention to the location of the hole. Then, you can fasten the connections with a gasket and nuts to seal the faucet to the sink. Before tightening mounting bolts, make sure the faucet can swing across the sink in a complete arc.
Step Three: Install the Kitchen Sink
Opening size, checked. Faucet, ready. Water supply, disconnected. Then we can start to install the kitchen sink. Before placing the sink, we need to install all the functional accessories. To install the strainer, you should put your sink upside down and seal it with putty or caulk, and then fasten the strainer to the sink-drain tailpiece. You can subsequently secure it with gaskets and nuts. This will reduce problems like water leakage and burst pipes.
After that, place your sink basin in the arranged position. You can seal your basin with silicone sealant in advance so that the edges, and apply glass glue to the edge seams so that your sink would be attached to the countertop more firmly. Remember to verify that the countertop front edge and the front of the sink are parallel and the surface is even. If not, you should adjust it.
Then we reach the final stop, to connect your sink to water supply pipes. You need to connect the inlet pipe of your faucet to the inlet switch. Take special care to differentiate the hot water pipes from cold ones and attach them firmly to the matching switch. Then, install the overflow pipe and other accessories. Do not forget to seal the joints.

Pro Advice: Several Tips When You Install the Kitchen Sink
- Make careful choices and consider the material when buying a basin sink. The material of your sink may influence how your basin can be installed. One frequently recommended choice is stainless steel sink because it is easy to fix and more solid.
- There are a few necessary preparations to make before you install the sink. The first thing is to drain the water in the pipes in advance to keep them water-tight and immune from rust. You should also clean the countertop, remove old putty and polish the cut to ensure that your sink fits into the opening.
- After the installation of the sink is completed, do not use it immediately. Before plumbing your kitchen sink, you should wait for a period of time to let the putty dry, thus preventing the moisture from penetrating the connections. After that, flush the pipes to remove the sediments.
- Check the connections with a drainage test. Firstly, fill the sink with water. Then, check whether all the connections are sealed and make sure that there is no water leakage. You can put a towel on the connections, particularly those that are near the tubing, the drain, and the trap to see if the towel is dampened. If there are leaks, carefully turn the nuts until the leak is stopped.
- Clean the cement, caulk, or putty left on the countertop. If they are not removed in time, they may dry out and leave stains, destroying the overall beauty of your kitchen. You can apply detergents and wipe them away with dampened cloth.
Summary
Installing a kitchen sink can be easy. Follow our instructions and most of us can install a sink in our kitchen all by ourselves. Last but not least, make sure that you choose the right kitchen sink. A stainless kitchen sink is currently a popular choice in the market for its excellent performance in durability, stability, and compatibility with various kitchen designs. If you have enough budget, you can consider a ceramic sink. We recommend you to find more choices at LESSO.

Ceramic Sink VS Stainless Steel Sink – How to Choose the Right One
Table of Contents Now that you have already decided on the kitchen style you want, you also need to settle on the type of sink

How to Choose the Right Sink for Your Kitchen
Table of Contents Whether you are planning on renovating or building your kitchen, you will need a kitchen sink. However, before settling for one, you